Trouble Shooting the AR15/M16
Click on any of the following links |
|---|
|
|
| Jamming Problems |
|---|
|
There are certain things to look out for here. Many people prefer to buy only Colt bolts, or GI issue parts and are afraid of other aftermarket parts such as offered by Nesard and others. If you carefully inspect some critical parts you can build a parts gun that is as reliable as any. Jamming can occur from short cycling, poor extraction or ejection. I have often been asked "What is the little rubber thing for on the extractor spring, the weapon fires fine without it?" At one point, Colt reduced the strength of the extractor spring to help prevent rim shear during extraction. They later found that this caused other problems like failed extractions and jamming. The solution was to add the "extraction spring insert" at the end of the extractor spring. This gave the spring a bit more pressure, yet allowed some compressability thus removing the excess force applied to the cartridge rim. The rubber gives before the brass does. This is another case where riflemen had best leave the designing to the designers, the part was placed there for good reason, don't leave it out. This is moreso relevant in full auto because the rhythm of the action may set up harmonic vibrations in the extractor spring, causing extraction problems.
Top of Document |
| Binding Bolt Carrier |
|---|
|
First check for binding in the bolt carrier. With the charging handle in place and the upper detached, slide the bolt carrier in and out without chambering any rounds. The carrier should slide in and out very freely without requiring much force. Bad carrier keys are common and have been known to cause binding that will cause a lot of wear on the upper and lead to jams.
Make sure the buffer, spring and tube are properly lubed. The buffer tube should be smooth with no lathe turning ridges. With the weapon assembled, pull the charging handle back and note some force is required to cock the hammer. Then let the handle fall back and repeat. There will be some dragging of the carrier on the hammer, but it should not require much force. Try again, keeping the trigger pulled. This time the disconnector will keep the hammer pulled back even farther, so the dragging will be very light but still there. There may be a problem with the lower/hammer if too much drag exists.
Top of Document |
| Ejector Tension |
|---|
|
Bad ejector tension is a major stumbling block that can be very frustrating and has lead people to sell their guns or buy Colt bolts, or pay gunsmiths a lot of money. Aftermarket bolts are frequently assembled using the same springs for the ejector as is used as a takedown detent spring elsewhere on the gun. The problem is that the ejectors themselves vary in length and possibly the holes in the bolts do too, so when these springs are used, they usually create excessive force on the ejector. The gun may appear to function properly but after a rapid fire string in the summer, cases will start jamming up into the gas tube groove in the upper receiver. At a DCM match this then leads to a number of helpful people poking at your gun with screwdrivers trying to get the case out.
Several of the springs involved are, showing the differing part numbers, denotes the differences in the springs
Ejector Spring, and Safety Detent Spring are part number 61569 The above springs can be viewed at the following two links...
Lower Reciever (takedown and safety detent springs)
Top of Document |
| Short Cycling |
|---|
|
If rounds are sometimes not chambered it is due to the bolt not coming back all the way. This also causes jams since the case may not be ejected. The problem is either something is binding, a bad part, the gas system or the ammo.
Binding Here you might look at the lands of the bolt carrier and the mating races on the upper receiver. Make sure there are no nicks, gouges or otherwise rough surfaces. If you find any, they may be removed with some very fine grit sandpaper or a fine file. Bad Ammo The M16 is a very ammunition sensitive rifle. When the original contracts were let, the ammunition specification was relaxed to allow using up some existing powder reserves. This powder was originally used in the M1 Garand rifle. This powder was too dirty and did not develop the chamber pressures necessary to operate the action of the rifle. This was one of the major things that caused the M16 to get a bad reputation in early Viet Nam. The bottom line, use good ammo! I have seen some plastic bullets for use in M16's at indoor ranges. It is my experience that these rounds do not develop enough chamber pressure to operate the action. I even tried trimming down the buffer spring to find one that would work with the plastic ammo... didn't work after removing as much as 4" from the spring. When firing .22LR in an adapter, NEVER use lead bullets, ALWAYS use jacketed bullets. Lead bullets will foul up the chamber in no time. Then you will have to scrape the leading out or if you fire any .223 without clearing the lead, you may damage the chamber. Gas System The gas tubes are supposed to be self cleaning and seldom plug up unless perhaps you are using weak loads that produce a lot of carbon. Using a .22 LR adapter (Ciener or Colt) and firing a lot of rounds can cause the gas system to become clogged. You should run some regular .223 ammo through every hundred rounds or so to keep the gas system clean. You may also find serious carbon build up in and around the carrier key. It is important to know your gas system and where the possible leakage points are: near the front sight, at the carrier key, at the gas rings, and where the bolt extends through the carrier by the firing pin. There will typically be some leakage at the front sight as seen by some black deposits, but if the tube fits tight it is probably OK. The bolt post to carrier hole clearance is typically very tight - less than .005". I have seen a number of "loose" fitting bolts, but the guns ran fine. If the bolt does not fall out of the carrier when you invert it, the gas rings are probably OK. Gas rings will rotate when you fire the gun and are not like car rings that seal into position. I have heard of problems where the ring gaps lined up, but have not seen any. It is a good idea to separate the gaps each time you install the bolt anyway. The biggest source of gas leak trouble is the carrier key to gas tube contact. With the bolt removed from the carrier and the charging handle removed, slide the carrier into the weapon and "feel" for any drag where the carrier key comes into contact with the end of the gas tube. You may have to gently bend the end of the gas tube to the point you feel very little drag when the key engages the tube. Bad Part I have seen some upper buttstock bolts made that did not have holes drilled through them. These will definitely cause a short cycling problem since the air in the buffer tube will not have a place to escape. It will act like an air cushion and prevent the bolt from cycling fully to the rear.
Top of Document |

| Carrier Key |
|---|
|
There are a lot of bad carrier keys out there. This is the one item that should be looked at very carefully. Not only are they a source of potential bolt/carrier binding, but they can cause excessive gas leakage if the fit to the gas tube is bad. Gas tubes have a little ridge on them where they fit into the carrier key that determines the degree of gas leak sealing. All the new gas tubes I have seen have a quite uniform diameter ridge and have not been a problem except when they get worn down. The ridge can wear down a couple thousandths which then can cause excessive leakage. This can happen after 1000 rounds or so, but the quality of your carrier key can definitely affect this. A ridge on the inside of the key can cause the gas tube to wear prematureley and lead to an excessive gas leak problem. Even supposedly GI issue carrier keys have sometimes been known to have fairly rough inside surfaces, so pick them carefully.
Top of Document |
| Headspace | ||||||||
|---|---|---|---|---|---|---|---|---|
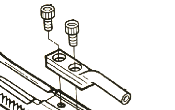
| There are a few things that should be pointed out regarding headspace gages. If you look in the Forster catalog for example, you will see the following for .223 Rem: | ||||||||
Headspace Gage Table
|
||||||||
|
| Magazine Problems |
|---|
|
Magazines are easy to come by at gun shows etc. Many of them have been picked up off a range, where they were shot once and stepped on a hundred times. You should check out all of your magazines before shooting with them.
First, an empty magazine should drop out of the rifle by its own weight when you press the magazine release. If it does not, then the mag is most likely mishapen and will need some work in a vise. Determine which side(s) the magazine is rubbing on and squeeze the magazine (lightly) in a vise in that direction. Be careful, because too much pressure will pop the spot welds and you will end up with a nice boat anchor. Second, load the magazine with several rounds, press down on the rounds and watch how the rounds ride back up to the top of the magazine. They should ride up nice and level with the lips at the top of the magazine. If they do not, you will need to dissassemble the magazine and rework the spring to cause more pressure to be applied on the end where the rounds were sagging. Third, check the lips of the magazine to make sure they are not colliding with the bolt carrier with the magazine installed in the rifle. Also check to be sure that the lips are not pinching that portion of the bolt that rides between them.
Top of Document |
[an error occurred while processing this directive]